Prerequisites
Before you begin, ensure you have:- A Straddle account with API access
- A Quiltt account with API access
- Enable Straddle’s Quiltt integration in your Quiltt account. If you need assistance with this step, reach out to your Account Manager with Quiltt.
-
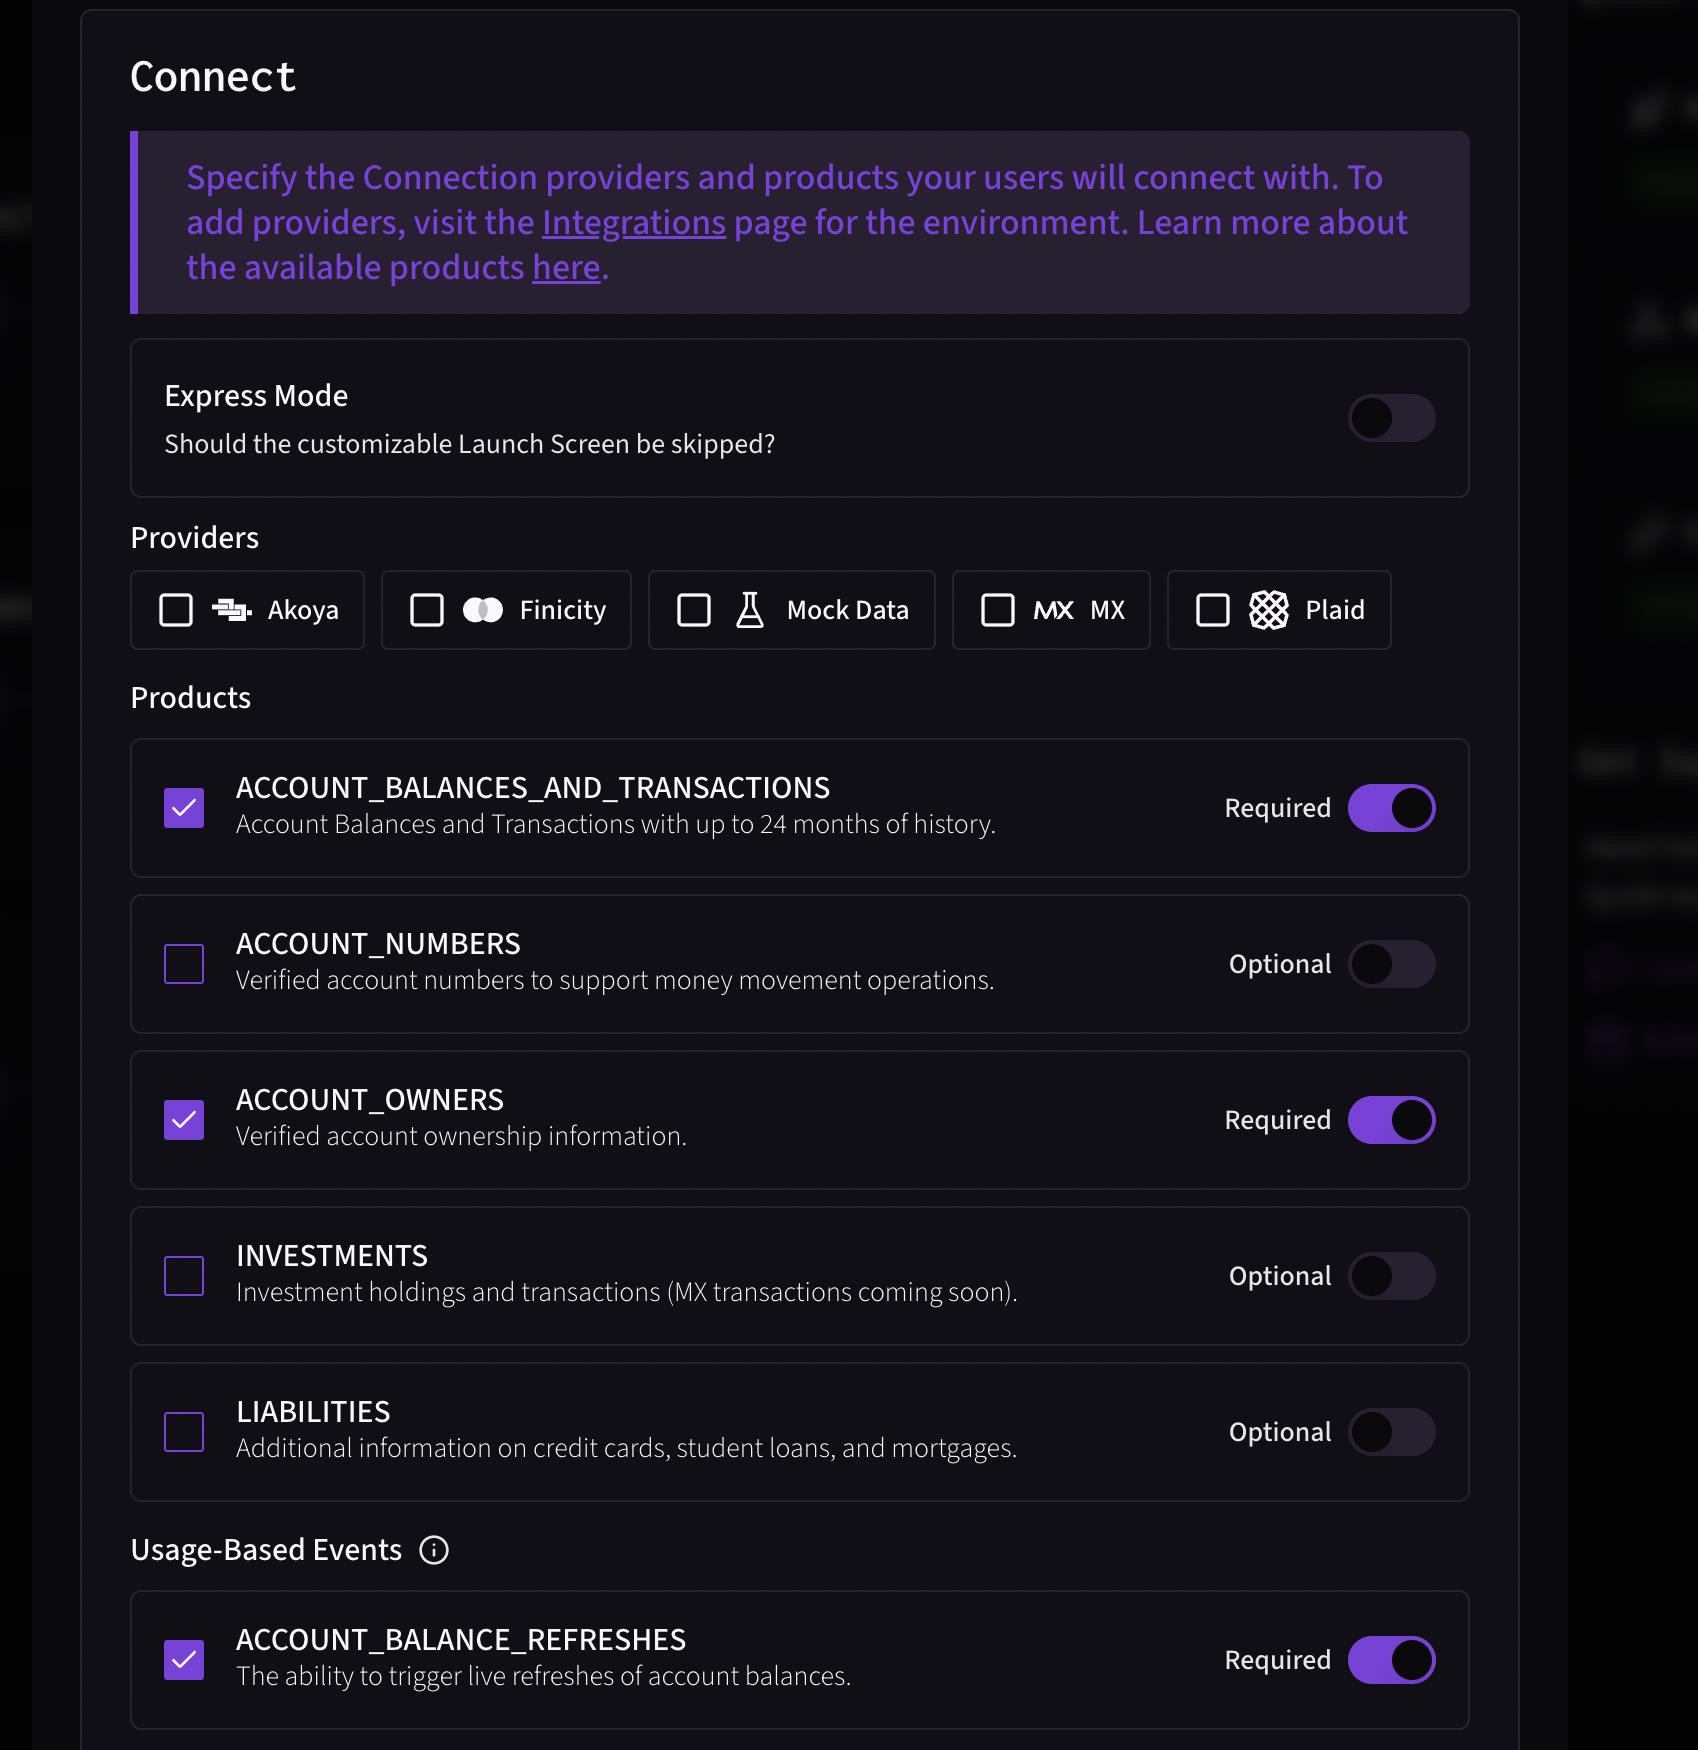
Your Quiltt Connectors need to have access to
ACCOUNT_NUMBERS,ACCOUNT_BALANCE_REFRESHESandACCOUNT_BALANCES_AND_TRANSACTIONSfeatures for Straddle to be able to fetch the needed information. In Sandbox, make sure that you are using a real connector sandbox environment, like MX or Finicity.
Implementation Steps
1. Set up Quiltt Connector for user bank account connection
1. Set up Quiltt Connector for user bank account connection
Integrate Quiltt Connector into your frontend to allow users to securely connect their bank account. Quiltt Connector is the front-end module that facilitates the connection between the user’s bank account and your application.
2. Obtain an Account Id from Quiltt
2. Obtain an Account Id from Quiltt
Once the user connects their bank account using Quiltt Connector, Quiltt will return a Connection Id in a callback. Use the GraphQL API to fetch the Account Id from the Connection Id.
3. Use the Account Id to get a Straddle processor token from Quiltt
3. Use the Account Id to get a Straddle processor token from Quiltt
With the Account ID obtained from Quiltt, request a Straddle processor token from Quiltt. This token allows you to link the user’s bank account to Straddle’s payment processing system.
4. Use the Straddle processor token to create a secure payment token via Straddle's Bridge API
4. Use the Straddle processor token to create a secure payment token via Straddle's Bridge API
Pass the Straddle processor token to Straddle’s Bridge API. Straddle will return a
paykey which is linked to the user’s bank account, allowing future transactions to be processed.5. Store and use the paykey for future transactions
5. Store and use the paykey for future transactions
Store the
paykey securely in your system. Use this paykey to create charges, initiate payments, or perform other transactions via Straddle’s API in the future.Setting Up Quiltt
Configure Quiltt product and Connector settings in the Quiltt dashboard
To get the most out of the Straddle integration with Quiltt, be sure to enable the following features in your Quiltt dashboard:- Navigate to your Connector configuration
- Enable the following features:
- ACCOUNT_NUMBERS - Required for processor token generation
- ACCOUNT_BALANCES_AND_TRANSACTIONS - Required for Account Balance verification (Optional, but required for account balance verification when doing Charges)
- ACCOUNT_BALANCE_REFRESHES - Required for account balance refresh (Optional, but required for account balance verification when doing Charges)
- ACCOUNT_OWNERS - For identity verification (Optional)
Quiltt’s unified API automatically handles data transparency and compliance requirements across multiple banking data providers.
Intro to Connector
Quiltt Connector is the client-side component that your users will interact with in order to link their accounts to Quiltt and allow you to access their accounts via the Quiltt API. Quiltt Connector will handle credential validation, multi-factor authentication, and error handling for each institution that Quiltt supports through its multi-provider network. Connector is supported via SDKs for all modern browsers and platforms, including JavaScript, React, iOS, and Android. For webview-based integrations or integrations that don’t have a frontend, Quiltt also provides URL-based integration options. To try Connector, visit the Quiltt Dashboard.We’ll do our best here to give you a rundown of the steps required to start building on Quiltt and connect to Straddle. However, you should always treat Quiltt’s official documentation as the ultimate source of truth during integration with their platform.
Create a Session Token
Now you’re ready to start building. In order to integrate with Quiltt Connector, you will first need to create a Session Token. A Session Token is a short-lived, one-time use token that is used to authenticate your app with Connector and initiate a session for a user. To create one, make a request to the Session API with your API credentials and user information from your app server.View the Session Token documentation for a full list of configurations.
Initialize Connector
Once you have a Session Token, all it takes is a few lines of client-side JavaScript to initialize Connector. Then, in theonExitSuccess callback, you can call a simple server-side handler to create a Straddle processor token.
Obtaining a Straddle Processor Token from Quiltt
Once you have established a connection, you need to:- Fetch the account details using Quiltt’s GraphQL API
- Create a processor token for Straddle
STRADDLE is the specific processor you’re requesting the token for. This tells Quiltt to generate a token compatible with Straddle’s systems. The issuer field should be set to QUILTT.
Using the Straddle Bridge API with Quiltt Token
Once you have obtained the Straddle processor token from Quiltt, you can use it to create a paykey via Straddle’s Bridge API. Here’s the correct HTTP request format:Bridge a Quiltt Token
YOUR_STRADDLE_API_KEY with your actual Straddle API key, and fill in the appropriate values for customer_id and quiltt_token. The metadata field is optional but can be useful for storing additional information related to the Quiltt account.
Straddle will interact with Quiltt’s API on your behalf to resolve the user’s bank account details and ownership information.
Handling the Straddle API Response
The Straddle API will respond with a paykey object. Here’s an example of what you might receive:source field is set to quiltt in this case, indicating that the paykey was created using a Quiltt token.
You should store this paykey securely for future use in transactions. When it’s time to get paid, create a charge and Straddle will automatically attempt to verify the account’s balance prior to origination.
Best Practices and Security Considerations
- Token Security: Never expose Quiltt API keys or Session tokens to the frontend. Always handle processor token creation server-side.
- Error Handling: Implement robust error handling for both Quiltt and Straddle API calls.
- Metadata Usage: Use the metadata field to store relevant information, such as the Quiltt connection and account IDs, for future reference.
- Token Refreshing: Session tokens expire after a period of time. Implement token refresh mechanisms as needed.
- Compliance: Ensure you’re complying with both Quiltt and Straddle’s terms of service and data handling requirements.
- Logging: Implement comprehensive logging for debugging and audit purposes, but be careful not to log sensitive information.
Troubleshooting Common Issues
-
Invalid Processor Token: Ensure you’re using
straddleas the processor when requesting the token from Quiltt. - Authentication Errors: Double-check your API keys for both Quiltt and Straddle. Remember that Quiltt uses Bearer authentication.
- Expired Tokens: If you’re getting authentication errors, your session tokens might have expired. Create a new session token for the user.
- Account Not Supported: Some bank accounts may not be supported for ACH transactions. Handle these cases gracefully in your UI.
- Rate Limiting: Be aware of rate limits on both Quiltt and Straddle APIs. Implement appropriate backoff strategies if you hit these limits.
-
Missing Features: If you can’t create processor tokens, ensure your Quiltt Connector has the
ACCOUNT_NUMBERSfeature enabled. -
Connection Status: Verify that the connection status is
activebefore attempting to create processor tokens.